Learning how to use air fryer settings comes down to three things: getting the temperature right, giving the food room to breathe, and turning it partway through. An air fryer is really just a small, powerful convection oven. A fan drives hot air around the food fast enough to crisp the outside the way a deep fryer does, but with a fraction of the oil. Once you understand that, the dial stops being intimidating and starts being the most-used appliance on your counter.
This guide walks through everything a first-timer needs: how the machine actually works, what to do before the first cook, the right temperatures and times, the handful of habits that separate soggy food from shatteringly crisp food, what to cook first, and how to clean it without scrubbing for an hour. By the end you will reach for it on autopilot.
How an Air Fryer Actually Works
Inside the unit is a heating element and a fan. The element warms the air, the fan blows that hot air down and around the food at high speed, and the perforated basket lets it circulate underneath as well as on top. That moving heat is what dries the surface and browns it quickly, which is the crisp texture people love. It is the exact same principle as the convection setting on a full-size oven, just packed into a small chamber so it heats up fast and cooks with very little preheat.
Because the heat is concentrated and the cavity is small, an air fryer cooks faster and hotter than you expect. A tray of fries that takes 25 minutes in the oven is often done in 15. That speed is the appliance’s biggest advantage and also the reason food burns the moment you stop paying attention in the first week. Set a timer, check early, and you will dial it in within a few cooks.
Before Your First Cook: Setup and Seasoning

Unbox everything and wash the basket, drawer, and any racks in warm soapy water, then dry them fully. This removes manufacturing residue and the faint plastic-and-metal smell that almost every new unit has out of the box.
Set the machine on a flat, heat-safe surface with real clearance around it. The exhaust vents at the back push out a lot of hot air, so leave at least five inches behind and above it, and keep it away from cabinets, curtains, and the wall. It is a countertop appliance, not an under-cabinet one.
Run it empty once
Before cooking anything, run the empty air fryer at around 400 degrees Fahrenheit for five minutes in a ventilated kitchen. This burns off the residue and clears that new-appliance smell so it does not end up in your first batch of fries. Expect a little odor during this run; it is normal and goes away.
Understanding the Controls
Strip away the branding and every air fryer has the same two settings that matter: temperature and time. Models range from a single dial to a digital touchscreen with preset buttons for fries, chicken, fish, and so on. Those presets are just saved time-and-temperature combinations and they are a fine starting point, but they are tuned for an average portion. Once you learn the numbers below, you will set temperature and time yourself and get better results than any preset.
Most air fryers run from about 180 degrees up to 400 or 450 degrees Fahrenheit. That range covers nearly everything you will cook, from gently reheating to blistering wings. If your model has a “shake” reminder, it is just a timer nudge telling you to toss the basket; you can ignore it and shake on your own schedule.
The Temperature and Time Cheat Sheet
This is the single most useful thing to keep near the appliance. These are starting points for fresh food in a single layer; frozen food usually needs a few extra minutes, and a crowded basket always needs more time.
Notice the pattern: high heat (390-400 F) for things you want crackly like fries, wings, and frozen snacks; medium heat (350-375 F) for proteins and vegetables; low heat (300-325 F) for delicate baked goods that would scorch on the outside before the middle cooks. When in doubt, start lower, because you can always add a few minutes but you cannot un-burn a wing.
The Five Habits That Make Food Crisp
The appliance does the work, but these five habits are the difference between pale, steamy food and the crunch you bought it for.
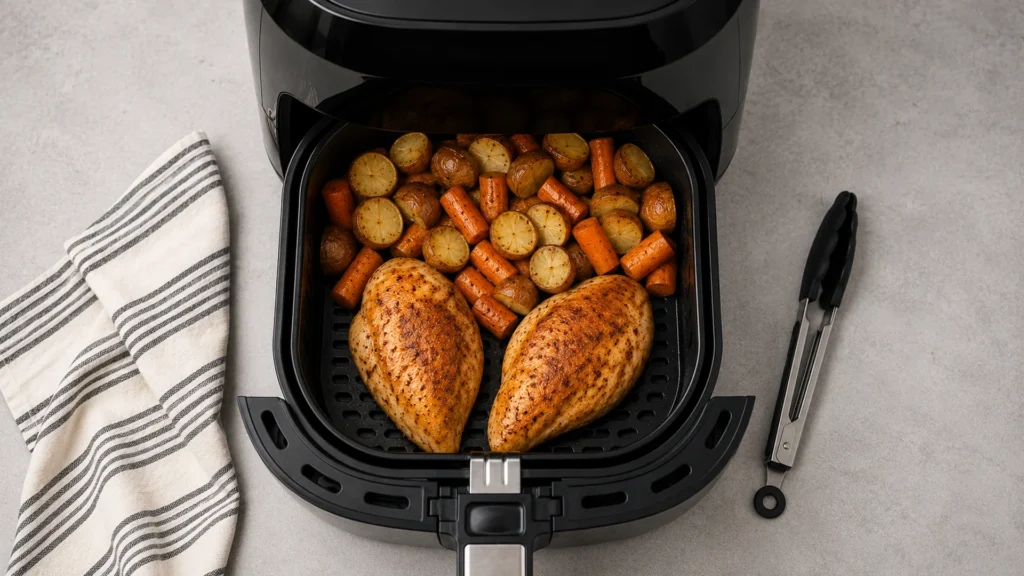
1. Do not crowd the basket
This is the number one beginner mistake. Air fryers crisp by moving hot air over every surface, and a piled-up basket blocks that airflow, so the food steams instead of browning. Spread food in a single layer with a little space between pieces. If you are cooking a lot, work in two batches; it is faster than it sounds and the results are night and day. This is exactly why a tray of crispy potato wedges turns golden when spaced out and turns limp when dumped in a heap.
2. Use a little oil, not none and not a lot
An air fryer can cook with no oil at all, but a very light coating, about one to two teaspoons tossed with the food or a quick spray, helps fresh food crisp evenly and brown better. Never drench it; excess oil pools in the drawer, smokes, and makes food greasy. For naturally fatty foods like wings, bacon, or sausages, skip the oil entirely because they render their own. One word of caution: avoid aerosol cooking sprays with additives, which can damage the nonstick coating over time. A refillable pump bottle of plain oil is the safe choice.
3. Preheat for crisp food
Preheating for two to three minutes gives food an immediate sear when it lands, which means crispier results and slightly shorter cook times. It matters most for fries, wings, and anything breaded. For longer cooks like a chicken breast or a batch of roasted vegetables it makes little difference, so do not stress about it there. Some newer models heat so fast that the manual tells you to skip it; follow your manual.
4. Shake or flip partway through
For small loose items like fries, chickpeas, or chopped vegetables, pull the basket and give it a firm shake once or twice so every side meets the heat. For larger single pieces like chicken breasts, pork chops, or air fryer lamb chops, flip them once at the halfway mark. The basket comes out mid-cook without turning the machine off, so this takes five seconds and dramatically evens out the browning.
5. Use a meat thermometer for anything that matters
Air fryers cook fast and unevenly until you know your machine, so guessing doneness on chicken or pork is risky. An instant-read thermometer is a few dollars and removes all doubt. Cook poultry to 165 F, and ground meats to 160 F, which are the standard safe internal temperatures worth memorizing for any meat. Pull food a few degrees early, since it keeps cooking as it rests.
What to Cook First
The fastest way to fall in love with an air fryer is to start with the things it does almost magically well, then branch out.
The easy wins
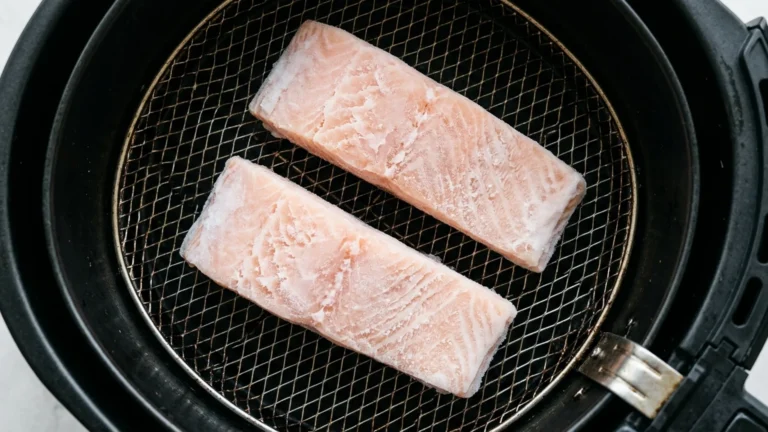
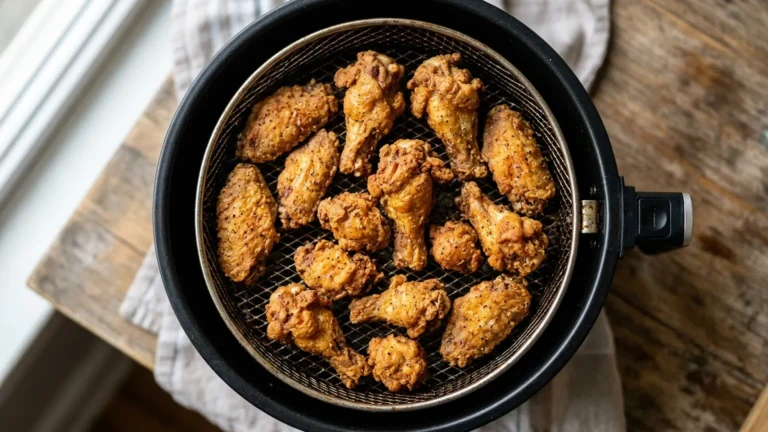
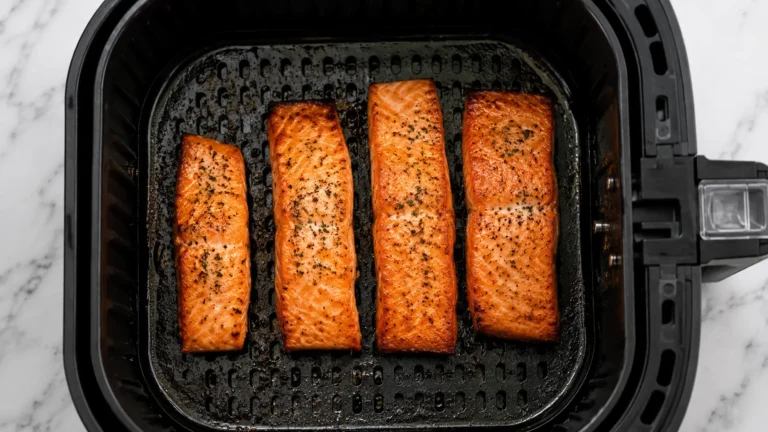
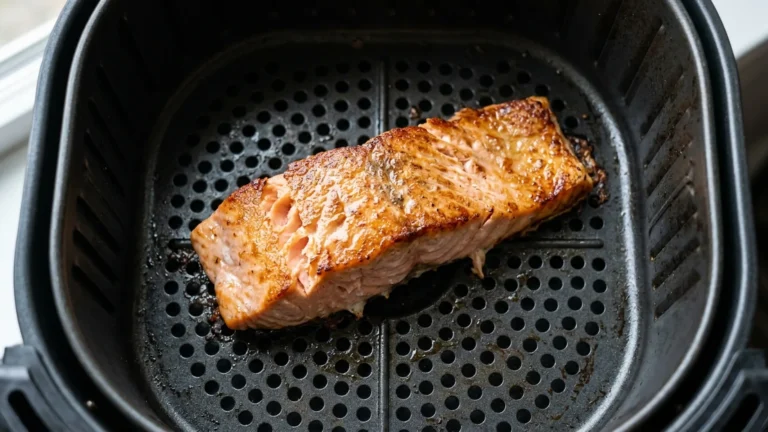
Frozen foods are the gateway. Fries, mozzarella sticks, spring rolls, and chicken nuggets come out crispier than the oven in half the time, with no oil added. Fresh vegetables are the next revelation: broccoli, Brussels sprouts, and cauliflower roast with caramelized edges in about twelve minutes. Wings are the appliance’s signature dish, rendering fat and crisping the skin without a drop of frying oil. Even plant-based options shine, and quick weeknight items like plant-based hot dogs get a snappy exterior in a few minutes.
Branching out
Once the basics feel easy, the air fryer handles whole proteins (salmon, pork chops, a small chicken), reheats pizza and fried food better than a microwave ever could, and even bakes in small batches. Bacon is a quiet star because the fat drips below the basket, leaving the strips crisp and the stovetop clean. For inspiration beyond meat, an entire category of vegan air fryer dishes works beautifully, and air-fryer techniques translate cleanly to gluten-free snacks and sides too.
What Not to Put in an Air Fryer
A few things simply do not work, and knowing them up front saves a mess. Wet batters, the kind you would dunk before deep frying, drip through the basket and bake onto the element instead of setting, so stick to dry coatings like breadcrumbs or a light flour dredge. Light leafy greens and loose herbs blow around in the fan and can hit the element; if you must, weigh them down. Foods that need a lot of liquid, like a saucy braise or anything boiled, are the wrong job for a dry-heat appliance. And do not overfill with cheese-heavy items that melt and run everywhere before they set.
Accessories and Liners: What You Actually Need

You do not need a drawer full of gadgets, but a few help. Perforated parchment liners make cleanup easier for sticky or breaded foods without blocking too much airflow, as long as you only add them once food is on top to weigh them down. A small oil mister, an instant-read thermometer, and a pair of silicone tongs cover almost everything. You can use foil and parchment in an air fryer, but there are real rules about how and when, especially around the fan and acidic foods, so it is worth reading up before you wrap anything. Whatever you add, never block more than a small part of the perforated basket, because airflow is the entire point of the machine.
Cleaning Your Air Fryer
Cleaning takes two minutes if you do it after every use and turns into a project if you let grease bake on. Once the unit has cooled, pull out the basket and drawer and wash them in warm soapy water; most are dishwasher safe, but hand-washing preserves the nonstick coating longer. Wipe the interior and the heating element with a damp cloth to catch splatter, and never submerge the main unit, which holds the electronics. For stuck-on residue, soak the basket for ten minutes first rather than scraping, since metal utensils and abrasive pads strip the coating. A quick wipe-down now prevents the smoke and smell that come from old grease later.
Common Beginner Problems and Fixes
- Food is not crispy. The basket is too crowded or the temperature is too low. Cook in a single layer, bump the heat, and add a light spray of oil.
- White smoke during cooking. Usually fat dripping onto the hot drawer from foods like bacon or burgers. Add a tablespoon of water to the bottom drawer to stop the grease from smoking.
- Food cooks unevenly. Pieces are different sizes or you did not shake. Cut food into uniform sizes and shake or flip partway through.
- It smells like burning plastic. If the unit is new, that is residue burning off; run it empty first. If it is not new, unplug it and check for food stuck on the element.
- Breading blows off. The coating was too dry or loose. Press breading on firmly, use an egg or oil layer to help it stick, and lightly mist before cooking.
A Few Pro Touches
Once the basics are second nature, small moves level up the results. Pat food dry before it goes in, because surface moisture turns to steam and steam is the enemy of crisp. Season after cooking for delicate spices that would burn, but salt sturdy foods before. Reserve the high-heat last two minutes to crisp the exterior of something that finished cooking through at a lower temperature. And keep a simple log on your phone of the temperature and time that worked for your favorites, because every air fryer runs a little differently and your notes will beat any preset. For deeper testing-backed technique, America’s Test Kitchen is a reliable place to read the why behind the how, and Consumer Reports independently tests air fryers if you are still choosing a model.
Frequently Asked Questions
Do you need to preheat an air fryer?
For crispy foods like fries, wings, and anything breaded, a two to three minute preheat gives a better sear and slightly faster cooking. For longer cooks like chicken breasts or roasted vegetables it makes little difference. Some newer models heat so quickly that the manufacturer says to skip preheating, so check your manual.
Do you have to use oil in an air fryer?
No, but a very light coating of one to two teaspoons helps fresh food crisp and brown evenly. Naturally fatty foods like wings, bacon, and sausages need no added oil because they render their own. Avoid drenching food or using aerosol sprays with additives that can harm the nonstick coating.
How full can you fill an air fryer basket?
Keep food in a single layer with a little space between pieces so hot air can circulate. Overcrowding is the most common reason food turns out soggy instead of crisp. For larger amounts, cook in batches rather than piling the basket high.
What temperature should a beginner start with?
Use about 400 F for fries and frozen snacks, 350 to 375 F for proteins and vegetables, and 300 to 325 F for delicate baked goods. When unsure, start lower and add time, since you can always cook longer but cannot reverse burning.
Why is my air fryer smoking?
The most common cause is fat dripping from foods like bacon or burgers onto the hot drawer. Add a tablespoon of water to the bottom drawer to stop the grease from smoking. With a brand-new unit, light smoke or smell is residue burning off, which is why you run it empty first.
Can you put aluminum foil or parchment in an air fryer?
Yes, with limits. Foil and parchment can be used to ease cleanup, but they must not block the airflow or the fan, and foil should not touch acidic foods. Only add a liner once food is on top to weigh it down, and never line the basket while the air fryer is empty and preheating.
Bottom Line
Using an air fryer well is not complicated once you internalize the core ideas: it is a fast convection oven, so set the right temperature, keep food in a single layer, add a little oil for fresh items, and shake or flip partway through. Start with frozen snacks and roasted vegetables to build confidence, lean on a thermometer for meat, and clean it after every use so it stays smoke-free. Keep the temperature cheat sheet on the counter for a week and you will stop reaching for it entirely, because by then the machine will feel like the easiest, fastest way to put crispy food on the table.