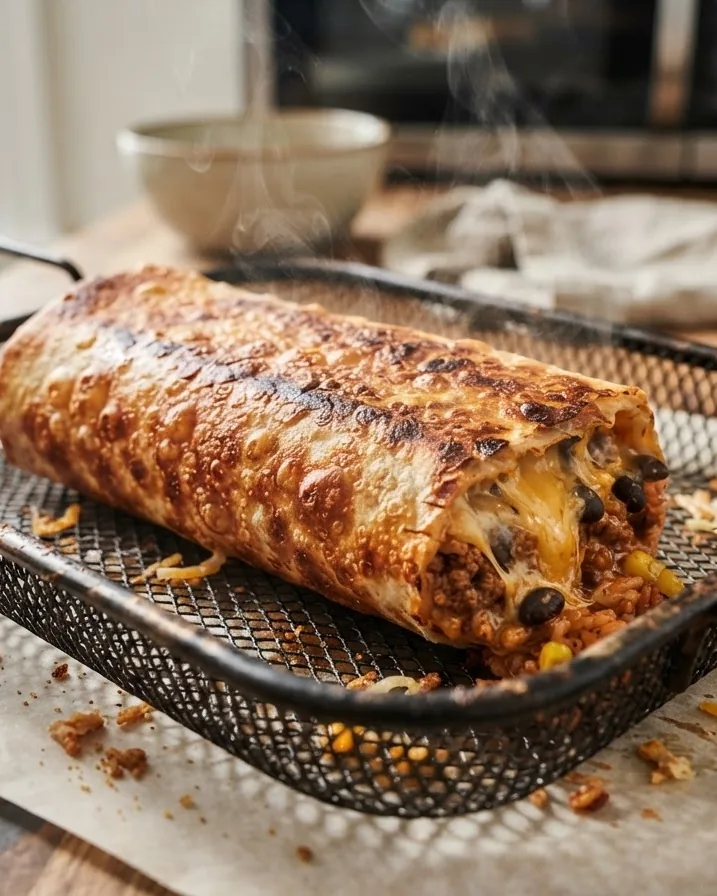
A frozen burrito in the air fryer is a strong argument against the microwave. Microwaving tends to give the same sad result: a rubbery, steam-limp tortilla with a lava-hot core and a stubborn frozen streak somewhere in the middle. At 350F in the air fryer for 15 minutes, the burrito gets a blistered, crackly shell and an evenly hot filling. The result is closer to something off a griddle.
The times below are compiled from published references covering several brands of frozen burrito, and the food-safety notes are grounded in the USDA Food Safety and Inspection Service.
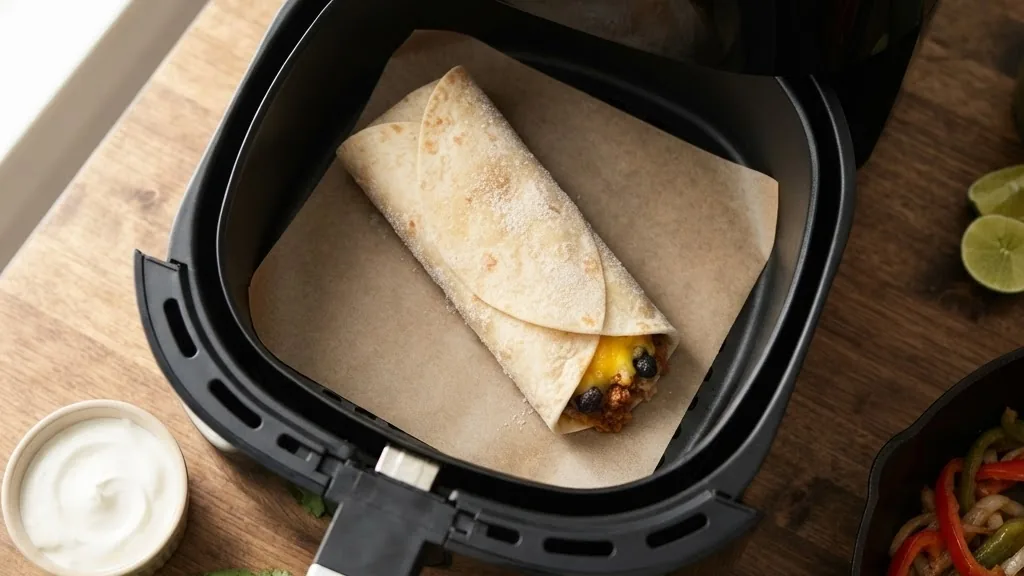
Quick answer: To cook a frozen burrito in the air fryer, preheat to 350F, place the burrito seal side up in a single layer, and cook for about 6 minutes. Flip it to seal side down and cook another 6 to 9 minutes, 12 to 15 minutes total, until the shell is crisp and golden and the center is steaming hot. Do not thaw it, do not add oil, and do not wrap it in foil. All three sabotage the crisp. Let it rest 2 to 3 minutes before biting, because the filling comes out molten.
Why the air fryer beats the microwave for frozen burritos
The microwave and the air fryer are doing completely different things, and the difference lands right in the texture. A microwave heats by exciting water molecules, which means it steams the tortilla from the inside out. Steam is the enemy of crisp, so you get a soft, floppy, sometimes gummy shell, and because microwaves heat unevenly you often get that infamous cold pocket in the middle next to a scalding one.
The air fryer works by dry convection instead. Fast, hot air circulates around the whole burrito, driving moisture off the surface of the tortilla so it browns and blisters, while steadily heating the frozen filling through. You end up with the thing a microwave can never give you: an actual crunchy exterior. It is the same principle that makes the machine so good at fries and other frozen foods, explained in the guide on how an air fryer works.
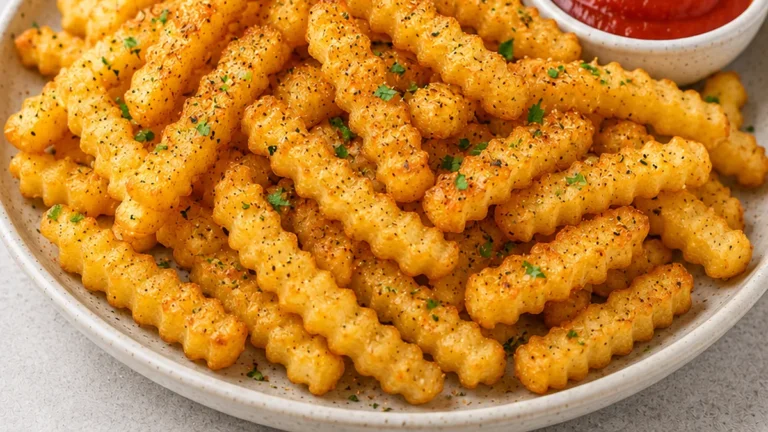
The oven can crisp a burrito too, but it takes 25 to 30 minutes and heats your whole kitchen for one handheld dinner. The air fryer splits the difference perfectly: microwave-fast, oven-crispy. For a single-serving frozen food, it is genuinely the best tool in the kitchen, from burritos to frozen fries in the air fryer.
Time and temperature chart
Temperature stays low and steady at 350F, which is the key detail. Go much hotter and the tortilla scorches before the frozen center catches up. The time shifts a little with the size and type of burrito.
| Burrito type | Temperature | Total time | Method |
|---|---|---|---|
| Standard bean and cheese | 350F | 12 to 15 minutes | 6 min seal up, flip, 6 to 9 min |
| Large stuffed (meat and beans) | 350F | 15 to 16 minutes | Add time for the denser center |
| Breakfast burrito (egg) | 350F | 10 to 12 minutes | Thinner, finishes sooner |
| Extra crispy shell | 350F | 14 to 16 minutes | Optional light oil spray |
As always, your machine has a personality. Mine crisps a standard burrito in exactly 14 minutes; a stronger unit might do it in 12. The safest move on your first one is to check it a couple of minutes early and go by how the shell looks and how hot the center feels. Once you have your number, you will repeat it without thinking. If you are still figuring out your unit’s habits, the beginner guide on how to use an air fryer covers the basics.
Step by step: seal side up, then flip
There is exactly one technique detail that separates a great air fryer burrito from a burst, unraveled mess, and it is which way the seam faces. Get that right and the rest is trivial.
- Preheat to 350F for 3 to 5 minutes. A hot chamber crisps the shell from the first minute and keeps your timing predictable. My guide on how to preheat an air fryer covers why this small step pays off.
- Place the burrito seal side up. This is the move. Starting with the folded seam facing up lets it set and firm before it ever bears any weight, so it does not pop open. Give each burrito space in a single layer.
- Cook 6 minutes at 350F. The top crisps and the seam sets during this first stretch.
- Flip to seal side down. Now the seam is set and can safely face the basket floor, where it crisps and seals shut instead of splitting open.
- Cook 6 to 9 more minutes. This finishes the crisp and drives heat into the center. Standard burritos hit 12 to 15 minutes total; big stuffed ones lean toward 16.
- Rest 2 to 3 minutes, then check the center. The filling is molten right out of the basket. A short rest lets the heat equalize and saves your mouth. Confirm the center is steaming hot before you commit.
That seal-up-then-flip order is the whole trick. Cooked seam-side-down from the start, a bean and cheese burrito can slowly yawn open and leak filling all over the basket. Set the seam first, flip second, and it stays wrapped like it should.
The three things not to do
Most burrito failures come from adding steps that feel helpful but actually hurt. The package or old habits push three of them, and all three should go.
- Do not thaw it first. Frozen burritos are built to cook from frozen. A thawed one goes soggy and mushy, and the tortilla can turn gummy because the moisture has already migrated into it. Straight from the freezer is correct.
- Do not add oil. The tortilla has enough fat to crisp on its own in the dry air, and added oil tends to make the shell greasy and soft rather than crunchy. If you are chasing maximum crunch, the most a light spray does is marginal, and it is genuinely optional. The default is none.
- Do not wrap it in foil. Foil is the crisp-killer. It traps steam against the tortilla and blocks the circulating air from reaching the surface, which is the entire mechanism that crisps it. Wrapping a burrito in foil turns your air fryer back into a slow, soggy oven. Leave it bare.
Strip those three away and the machine does exactly what it is good at. The burrito is not being fried or steamed; it is being crisped by moving hot air, and it needs its surface exposed and dry to do that.
Breakfast burritos and big stuffed burritos
The type of burrito changes the timing at the edges. Breakfast burritos, usually thinner with egg, cheese, and maybe sausage or potato, finish faster, around 10 to 12 minutes at 350F, because there is less dense frozen mass in the center. Keep an eye on them so the thin tortilla does not over-brown before the egg is hot.
The big, densely packed burritos, the ones loaded with meat, beans, rice, and cheese, are the opposite problem: the shell can crisp and even start to darken while the packed frozen core is still catching up. For those, either give them the full 15 to 16 minutes, or if the outside is browning too fast, drop the temperature to 340F and extend the time a couple minutes so the center has a chance to reach hot before the shell overdoes it. The denser the filling, the more patience it wants.
Food safety: getting the frozen center hot
The one real risk with any frozen burrito is a cold center, and it matters most when the filling contains meat, egg, or cheese. Because the air fryer crisps the outside quickly, it is genuinely possible to pull a burrito that looks done but still has a cool or frozen streak inside. That is the thing to guard against.
The USDA Food Safety and Inspection Service advises reheating leftovers and prepared frozen foods to an internal temperature of 165F. A meat-filled burrito should hit that in the center. The practical check is simple: the middle should be steaming hot, not just warm, and if you want certainty, especially with meat fillings, slide a thermometer into the center and look for 165F. If it is not there, give it another two or three minutes. This is the same standard that applies to reheating any meat dish, and a cheap probe thermometer is the easiest way to check it.
The 2-to-3-minute rest after cooking helps here too, not just for your mouth but because the heat keeps equalizing through the filling as it sits, evening out any slightly cooler spots. The primary sources are the USDA FSIS safe temperature chart and the USDA FSIS leftovers and food safety guidance.
Air fryer vs microwave vs oven, side by side
The case for the air fryer over the microwave is made above, but it is worth putting all three methods side by side, because the differences are stark and they explain exactly why the texture changes so much. Same frozen burrito, three appliances, three completely different results.
| Method | Time | Shell texture | Center |
|---|---|---|---|
| Air fryer | 12 to 15 minutes | Crisp, blistered, griddle-like | Evenly hot |
| Microwave | 2 to 3 minutes | Soft, rubbery, sometimes gummy | Hot spots and cold spots |
| Oven | 25 to 30 minutes | Crisp but slower | Evenly hot |
The microwave is the fastest by a mile, and on a truly desperate morning that speed wins. But it steams the tortilla soft and heats unevenly, which is the exact combination that makes people think frozen burritos are mediocre food. The oven matches the air fryer on crisp and evenness but takes twice as long and heats your whole kitchen for one handheld meal. The air fryer lands in the sweet spot: nearly microwave-fast, oven-crispy, and even in the center. For a single-serving frozen food, that balance is hard to beat, and the same logic applies to everything from burritos to frozen fries in the air fryer.
Chimichangas, taquitos, and other frozen wraps
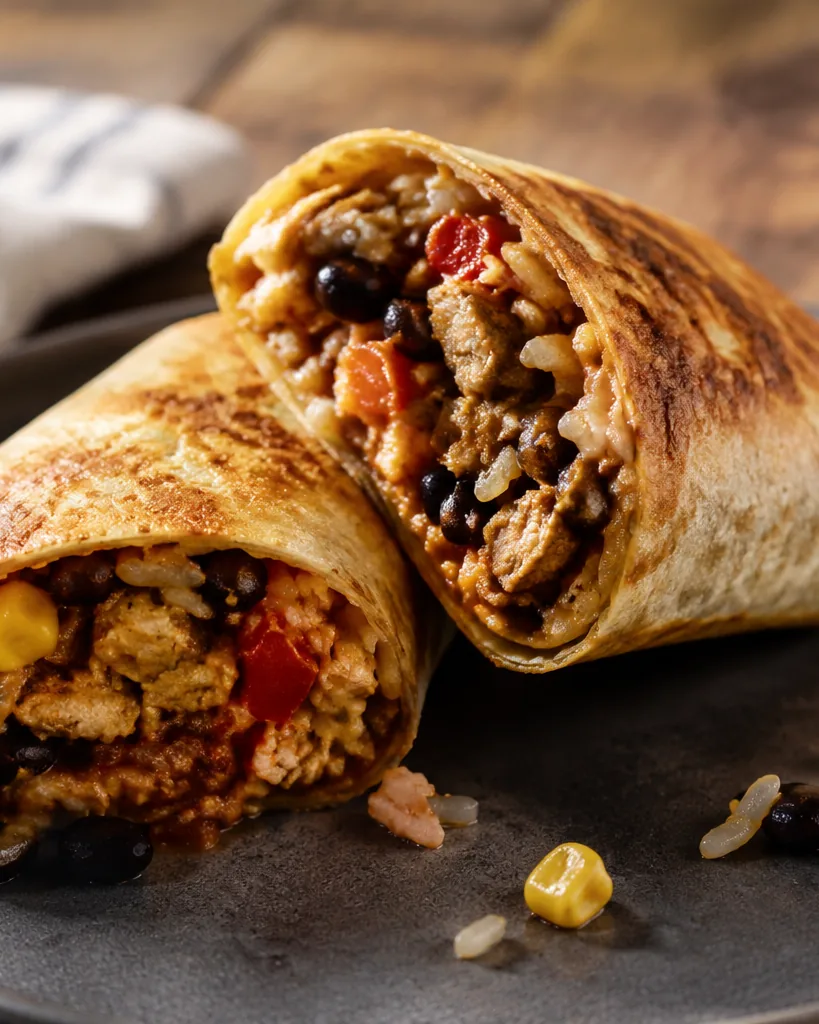
The seal-up-then-flip technique and the 350F setting carry over to the whole family of frozen wrapped foods, which is one of the quiet joys of owning the machine. Frozen chimichangas, which are essentially fried burritos, come out spectacular in the air fryer because the dry heat crisps the shell exactly the way deep frying would, without the oil bath. Cook them like a large burrito, around 12 to 15 minutes at 350F, seam managed the same way.
Taquitos and flautas are the easiest wins in this category. They are thin and roll up tight, so they crisp fast, usually 8 to 12 minutes at 375 to 400F, shaken or flipped once, until they are golden and crackly end to end. They go from freezer bag to a plate of crunchy, dippable snacks faster than the oven can even preheat. Empanadas and frozen egg rolls follow the same idea: dry convection crisps the exterior while the filling heats through.
The one thing to keep watching across all of these is the same as with burritos, which is that the outside crisps faster than a dense frozen filling heats, so the center is where you confirm doneness. For anything with a meat or egg filling, the center should be steaming hot, and 165F is the number to hit if you check with a thermometer. Thin taquitos rarely have this problem; fat chimichangas can, so give them the full time.
Toppings, dips, and making it a meal
A crispy burrito is a great base, and a few extras turn it into a real plate. My move is to crack the finished burrito open and hit it with cold toppings that contrast the hot crisp shell: shredded lettuce, diced tomato, a spoon of sour cream, some hot sauce. Guacamole and salsa on the side turn it into something closer to a restaurant plate than a freezer dinner.
For a melty upgrade, sprinkle a little shredded cheese over the top of the burrito for the last 2 minutes of cooking so it melts into the crisp shell. Another option is a smothered version: crisp the burrito, plate it, then ladle warm enchilada sauce and more cheese over the top, which turns a freezer item into something that looks like it came off a restaurant menu. For a fuller meal, cook a batch of fries or tots alongside, or add a simple protein like the ones in the guide to frozen chicken breast in the air fryer. The whole point of the air fryer is turning cheap freezer staples into something that actually feels like dinner, and the crispy burrito is the flagship of that idea. Serve it with rice and beans on the side and nobody at the table would guess it started as a dollar item from the freezer aisle.
Making your own freezer burritos for the air fryer
Once you realize how well the air fryer crisps a frozen burrito, the natural next step is to make your own and stock the freezer, which is cheaper and tastes better than most store brands. A batch made on a slow Sunday becomes a month of fast meals. The trick is building them so they freeze and reheat well, which comes down to keeping the filling on the drier side.
Wet fillings are the enemy of a freezer burrito because the moisture soaks into the tortilla during storage and leaves you with a soggy shell no appliance can fully rescue. So drain and cool everything before rolling: seasoned meat or beans, cooked rice, cheese, and any peppers or onions that have been cooked down so they are not watery. Skip the fresh salsa and sour cream inside; those go on after cooking. Roll them tight, seam side down for storage, wrap each one, and freeze on a tray before bagging so they do not stick together.
To cook your homemade ones, treat them just like the store-bought version: straight from frozen, seal side up at 350F, flip after 6 minutes, and finish to 12 to 15 minutes total until crisp and steaming hot in the center. Because you controlled the filling, you know exactly what is inside, and a batch of these turns the air fryer into a genuine meal-prep engine. To round out the plate, cook a protein alongside using the guide to frozen chicken breast in the air fryer, and lunch is covered for a week.
The bottom line on air fryer frozen burritos
A frozen burrito in air fryer form is the meal that best proves what this machine is for: taking a cheap, humble freezer item and giving it a texture no microwave could dream of. The formula is easy to remember. Preheat to 350F, cook seal side up for 6 minutes, flip to seal side down, and finish to 12 to 15 minutes total until the shell is crisp and the center is steaming hot. No thawing, no oil, no foil.
The two moves that matter most are the seam and the temperature. Starting seal side up keeps the burrito from bursting open, and holding a steady 350F crisps the tortilla without scorching it before the frozen middle catches up. Rest it a couple of minutes so the molten filling settles and the heat evens out, and check that meat or egg fillings hit a hot, 165F center. Do that and you get a crackly, griddle-style shell around an evenly hot filling every time, which is a genuinely better lunch than the same burrito deserves for the effort involved.
Frequently asked questions
How long do you cook a frozen burrito in an air fryer?
About 12 to 15 minutes at 350F: roughly 6 minutes seal side up, then flip and cook another 6 to 9 minutes. Big stuffed burritos lean toward 16 minutes, while thinner breakfast burritos finish around 10 to 12.
What temperature is best for frozen burritos?
350F. It is hot enough to crisp the tortilla but low enough that the shell does not scorch before the frozen center heats through. Going hotter risks a burnt outside and a cold middle.
Should I thaw a frozen burrito before air frying?
No. Cook it straight from frozen. Thawing first leads to a soggy, mushy tortilla because the moisture migrates into the shell. The dry air of the fryer is what crisps a frozen burrito best.
Why did my burrito burst open in the air fryer?
Almost always because the seam faced down from the start. Place the burrito seal side up first so the seam sets and firms, then flip it seal side down after about 6 minutes. That keeps it wrapped instead of unraveling.
Do I need to add oil or foil?
No to both. Oil tends to make the shell greasy and soft, and foil traps steam and blocks the airflow that crisps the tortilla. Cook the burrito bare for the crispiest result.
How do I know a frozen burrito is fully heated?
The center should be steaming hot, not just warm. For meat, egg, or cheese fillings, the USDA target is 165F in the center; check with a thermometer if unsure, and rest it 2 to 3 minutes so the heat equalizes.nnSources: USDA Food Safety and Inspection Service, safe minimum internal temperature chart and leftovers and food safety guidance (reheat to 165F); cooking times are compiled from published air-fryer references covering several frozen burrito brands.nnAuthoritative references: USDA FSIS safe minimum internal temperature chart and USDA FSIS leftovers and food safety.