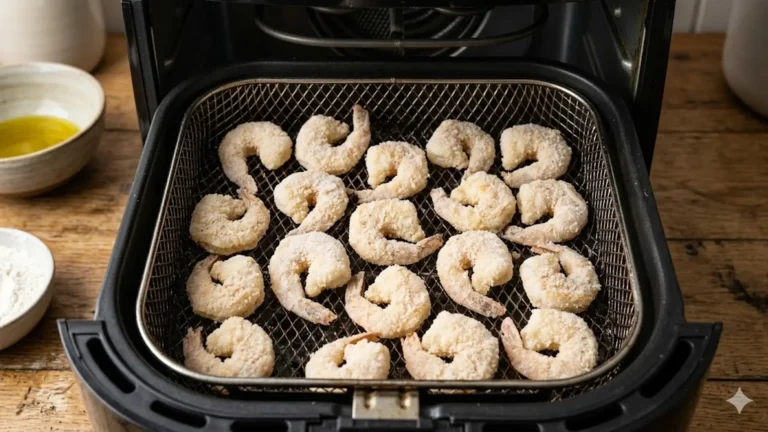
Can you toast bread in an air fryer? Yes, and it works better than most people expect once you stop treating the basket like a toaster slot. The short version: lay one layer of bread in the basket, run it at 400F for 3 to 5 minutes, and flip it once if you skipped the butter. That is the whole trick. The longer version, the one that keeps your bread from flapping around and burning on one corner, is what most recipes leave out, so that is where I want to spend the time.
I have toasted more bread in an air fryer than I care to admit, partly because my actual toaster died in the middle of a holiday breakfast and the basket became the backup. After a few hundred slices I stopped thinking of air fryer toast as a compromise. It is its own thing, with real advantages and two real annoyances. Let me walk you through all of it.
The Quick Answer, and Why It Holds Up
An air fryer toasts bread by blasting hot, fast-moving air across both surfaces at once. That convection is the same physics a toaster uses with its glowing elements, just delivered by a fan instead of radiant coils. The result browns evenly and crisps the surface while keeping the center soft, assuming you do not walk away and forget it.
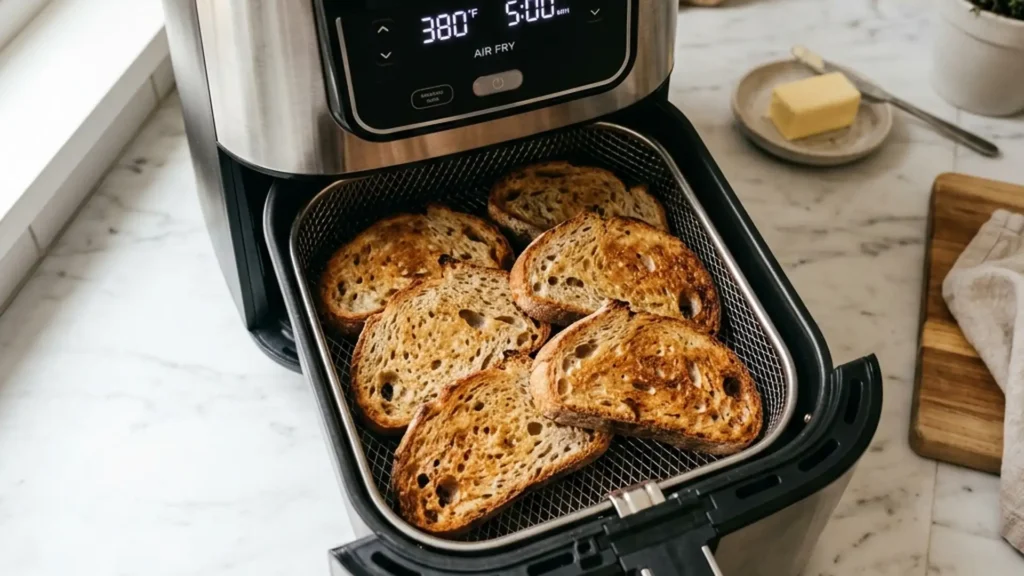
Set the temperature to 400F. Place the slices flat, not stacked, not leaning. For plain bread with no butter, run it 3 minutes, flip, then 1 to 2 more minutes. For buttered bread, you can often skip the flip because the fat conducts heat into the top surface and browns it without help. Pull it the second it looks one shade lighter than you want, because carryover heat keeps working for another 20 seconds after the basket stops.
That is the baseline. Everything below is about the edge cases nobody warns you about: the bread that lifts off and hits the heating element, the thick slice that chars outside and stays raw inside, and the frozen slice you forgot to thaw.
The Problem Everyone Hits: Bread Flying Around

Here is the complaint you see under every air fryer toast post and never see solved: the bread flies all over. A light, dry slice of sandwich bread weighs almost nothing, and a basket fan can push 30 to 40 cubic feet of air per minute. The slice lifts, drifts toward the top of the basket, and parks itself against the heating element where it scorches in seconds. This is the single biggest reason people decide air fryer toast is not worth it. It is also the easiest thing to fix.
Run through these in order and stop at the first one that works for your machine:
- Add a little weight first. A thin smear of butter or oil on the top surface adds just enough mass and tackiness to keep most slices grounded. This is why buttered toast almost never flies and plain dry bread does.
- Use a metal rack or trivet. If your air fryer came with a wire rack, set the bread on it. The rack sits low and breaks up the airflow pattern that lifts the slice. A small oven-safe trivet works too.
- Anchor it with a toothpick. Push a wooden toothpick down through the bread and into a slice of something heavier underneath, or simply pin two slices together at one corner. Sounds silly. Works every time.
- Toast more, not less. A full single layer of slices wedged lightly against each other braces the whole batch. One lonely slice in a big basket is the one that goes airborne.
What does not work: cranking the temperature to “get it over faster.” Hotter air moves faster, which lifts light bread more aggressively, not less. Keep it at 400F and weigh the bread down instead.
Time and Temperature by Bread Type
Not all bread toasts at the same pace. Density, moisture, and thickness all change the math. A flimsy slice of white sandwich bread is mostly air and toasts in half the time of a dense slab of sourdough. Here is what I land on after a lot of trial and error. Times assume 400F and a basket-style air fryer; flip plain bread at the halfway mark.
| Bread | Temp | Time | Notes |
|---|---|---|---|
| White sandwich | 400F | 3 to 4 min | Flies easily; butter or weight it |
| Whole wheat | 400F | 4 min | Browns a touch faster from the sugars |
| Sourdough (thick cut) | 380F | 5 to 6 min | Drop the temp so the inside catches up |
| Texas toast | 375F | 5 to 7 min | Thick; lower temp prevents a raw center |
| Bagel halves | 390F | 3 to 4 min | Cut side up; heavy enough to stay put |
| English muffin | 390F | 3 to 4 min | Split first; nooks crisp beautifully |
| Frozen slice | 380F | 5 to 6 min | No thawing; add 1 to 2 min vs fresh |
The pattern to remember: the thicker and denser the bread, the lower you set the temperature. A high temp browns the outside before the heat reaches the middle, which is how you get a charred crust over a doughy center. Drop to 375F or 380F for anything more than half an inch thick and give it the extra minute.
Why Stale Bread Toasts Differently
Bread age changes the result more than people realize. Fresh, soft bread holds a lot of internal moisture, and that water has to leave before the surface can brown properly. So a day-old slice toasts faster and crisper than a slice straight from a fresh bag, and a slightly stale slice toasts fastest of all because it starts out drier. If your toast keeps coming out pale and a little chewy at the right time, the bread is probably too fresh and too moist. Knock 20 to 30 seconds off for stale bread and add it back for very fresh bread.
This is also why grocery-store sandwich bread, which is engineered to stay soft, behaves differently from a crusty bakery loaf. The soft stuff browns evenly but can stay limp in the center if you rush it; the bakery loaf crisps hard and fast. Neither is wrong. You just adjust by 30 to 45 seconds in either direction once you know your bread. After a week with the same loaf, you stop measuring and start eyeballing, which is the goal.
The Browning Threshold You Cannot See Coming
Here is a quantified thing competitors gloss over. Air fryer toast goes from golden to acrid in roughly one extra minute, faster than a toaster because there is no spring to pop it out. The window between “perfect medium toast” and “scorched” on a standard white slice at 400F is about 45 to 60 seconds. That is the whole margin.
So check early. At the 3-minute mark, open the basket and look. If it is pale, it needs another minute. If it is light gold, it is 30 seconds from done. Trust your eyes over the timer every single time, because air fryers vary wildly between models and a 1500-watt machine browns faster than a 1200-watt one. The smell is your last warning: the moment you catch a sharp toasty edge, it is done.
Frozen Bread, Straight From the Freezer
You do not have to thaw bread to toast it in an air fryer, and honestly it is one of the better uses for the appliance. Frozen bread holds its shape and resists flying because it is heavier and stiff, so the airborne problem mostly disappears. Drop the temp to 380F and add 1 to 2 minutes over the fresh-bread time. The first minute drives off the surface ice, then the browning begins. A frozen white slice that takes 3 minutes fresh wants about 5 minutes from the freezer.
One caution: do not stack frozen slices to save time. Ice between them turns to steam, the surfaces go soggy instead of crisp, and the middle slice never browns. One layer, always.
Toppings: When to Add Them

This is where air fryer toast genuinely beats a toaster, and it is the reason I kept using the basket even after I replaced my toaster. You can toast with toppings already on the bread. Cheese melts into the surface, cinnamon sugar caramelizes, garlic butter soaks in. A toaster cannot do any of that without making a mess of the slots.
Timing matters, though. Add cheese at the start only if you want it deeply melted and a little browned; for a softer melt, lay the cheese on for the last 1 to 2 minutes. Cinnamon toast wants the butter and sugar on before it goes in so the sugar has time to bubble and set, about 4 minutes at 380F. For garlic bread, brush on garlic butter, then run 4 to 5 minutes at 375F so the garlic toasts without burning. If you like the contrast, butter only one side and skip the flip, so you get a crisp dry top and a rich melted bottom.
The morning my toaster died, I had cinnamon toast on the menu for a houseful of kids and no backup plan. I buttered four slices, dusted them with cinnamon sugar, and ran them at 380F for 4 minutes in the basket. They came out better than the toaster would have managed, the sugar bubbled into a thin candy shell, and I could do all four at once instead of two-at-a-time pop-up rounds. That batch is the reason I never bought a new toaster. The lesson stuck: when a topping needs to caramelize rather than just warm, the air fryer is the right tool, not the compromise.
If toppings are your thing, the same convection trick scales up to bigger projects. The approach that crisps a frozen slice is the same one behind frozen corn dogs in the air fryer, where direct hot air sets a crust without any oil bath. Once you trust the basket with bread, you stop second-guessing it with everything else.
Air Fryer Toast vs the Toaster: An Honest Take
I will not pretend the air fryer wins on every front. A pop-up toaster is faster for one or two plain slices, it shuts itself off, and it does not need a flip. If you just want two pieces of dry toast with zero fuss, the toaster is the better tool and I will not talk you out of it.
The air fryer pulls ahead in three situations. First, volume: a full basket toasts 4 slices at once, and a larger model can do 6, while most toasters max out at 2 or 4 narrow slots. Second, toppings, as covered above. Third, thickness: a toaster slot chokes on Texas toast or a thick artisan cut, but the basket does not care how fat the slice is. If you are weighing the appliance choice more broadly, the tradeoffs between convection appliances are laid out in this look at the air fryer vs a conventional oven, and the same logic applies to toast.
For the science of why forced-air convection browns the way it does, America’s Test Kitchen has done extensive testing on air fryers and convection cooking, and Serious Eats breaks down the Maillard browning that gives toast its color and flavor.
Cleanup and Crumbs
Toast sheds crumbs, and an air fryer basket has a fan and a heating element that crumbs love to find. After a toast session, let the basket cool, then turn it upside down over the trash and tap. For stuck-on butter or melted cheese, a damp cloth on the basket and a soft brush around the element keep things from smoking next time. A perforated parchment liner cuts crumb cleanup to almost nothing, and it has a side benefit: it adds a hair of weight under light bread, which helps with the flying problem too. Skip solid foil that blocks airflow, but a vented liner is fine.
If you bake your own loaves, the toasting times above shift a little because homemade bread tends to be denser and moister than store-bought. Start at the lower end of the temperature range. For gluten-free loaves in particular, which dry out fast, you can find solid baking guidance in this collection of gluten-free bread recipes, then toast the slices at 380F so they crisp without turning to dust.
A Few Things That Will Save You
A short list of hard-won fixes. Do not preheat for toast; it is unnecessary and only adds time, since the bread starts browning the moment the air moves. Do not crowd the basket into two layers, because the bottom layer steams and the top layer browns, and you end up with neither. Do not use the highest temperature thinking it saves time, because past 400F you scorch the surface before the inside warms. And if a slice comes out pale in the center but dark at the edges, your temperature was too high; drop it 20 degrees and add a minute. For a side-by-side on potato textures using the exact same low-and-slow logic, the method behind frozen diced potatoes in the air fryer shows how lowering the temp buys you an even cook.
Frequently Asked Questions
Can you toast bread in an air fryer without it flying around?
Yes. The fix is weight and airflow. Brush a little butter or oil on top, set the bread on the included wire rack, or pin light slices together with a toothpick. A full single layer also braces itself. Avoid raising the temperature, which only pushes light bread harder into the element.
What temperature and time should I use for plain toast?
Start at 400F for 3 to 5 minutes. Flip plain bread at the halfway point for even color. Buttered bread browns on top without flipping. Check at 3 minutes, because the window from golden to burnt is under a minute.
Do I need to preheat the air fryer for toast?
No. Toast is thin and starts browning immediately, so preheating just wastes a few minutes. Drop the bread into a cold basket and start the timer.
Can you toast frozen bread in an air fryer?
Yes, and you do not need to thaw it. Use 380F and add 1 to 2 minutes over fresh-bread times. Frozen bread is heavier and stiffer, so it resists flying. Keep it to one layer so it crisps instead of steaming.
Why is my toast burnt on the edges but soft in the middle?
The temperature was too high for the thickness. Thick or dense bread needs 375F to 380F so the heat reaches the center before the crust chars. Lower the temp 20 degrees and add a minute.
How many slices can I toast at once?
As many as fit in a single flat layer without overlapping, usually 3 to 4 in a standard basket and up to 6 in a large model. Stacking causes uneven toasting, so toast in batches if you have more.
Bottom Line
Can you toast bread in an air fryer? Absolutely, and once you solve the flying-bread problem with a little weight or a rack, it becomes a genuinely good way to make toast, especially for thick slices, full batches, and anything you want topped before it crisps. Set 400F, watch the color instead of the clock, and drop the temperature for thicker or frozen bread. Do that and the basket will out-toast your old appliance more often than you would guess.