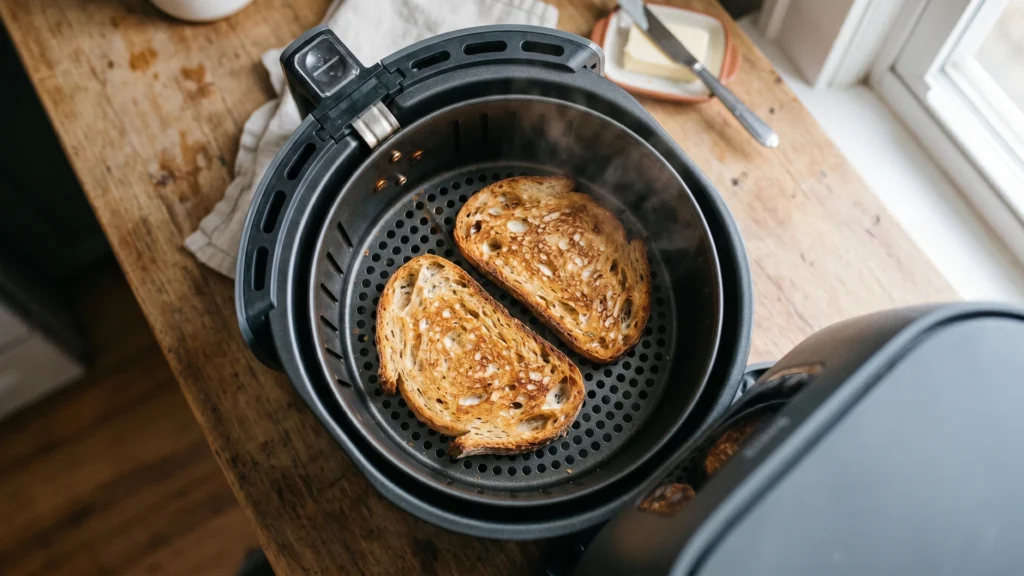
How to make toast in air fryer comes down to one simple recipe: lay the bread in a single layer, run it at 400 degrees F for 3 to 5 minutes, and flip it once at the halfway mark if you want both sides evenly browned. No preheating, no toaster, no fuss. You get crisp, golden toast with the kind of even color a pop-up toaster struggles to deliver, and you can make four slices at once instead of two.
The one quirk nobody warns you about is that bread is light and the air fryer fan is strong, so a slice can flip itself up into the heating element and char on one corner. The fix is easy and I will cover it below, but knowing it is coming saves you a smoky first attempt. Once you anchor the bread, air fryer toast is genuinely better than toaster toast, because the circulating heat browns the whole surface at once instead of just where the slice touches a hot wire.
Why make toast in an air fryer at all
If you own a toaster, this might sound redundant, but there are real reasons to reach for the air fryer instead. The first is capacity. A basket or oven-style air fryer toasts four to six slices in one go, which matters when you are feeding a family or making a stack for a crowd. A two-slot toaster makes you run batches and the first batch goes cold while the second cooks.
The second reason is even browning. A toaster heats the bread from two fixed wires, so you get darker stripes where the bread sits closest and pale gaps in between. The air fryer surrounds the bread in moving hot air, so the entire face browns at one even shade. For things like garlic bread, cheese toast, or thick sourdough that a toaster slot cannot even fit, the air fryer is not a backup, it is the better tool.
The third reason is versatility. The same basket that toasts your bread also makes the eggs, bacon, and hash browns to go on it. If you are already running the air fryer for breakfast, toasting the bread in the same machine keeps everything in one place and one cleanup. Our beginner walkthrough on how to use an air fryer covers building a full breakfast this way, and toast slots right into that flow.
The basic method, step by step

Here is the no-frills sequence for two to four slices of standard sandwich bread. It takes about 5 minutes start to finish and needs zero preheating, which is one of the small joys of toasting this way.
Place your bread slices in the basket or on the air fryer rack in a single layer. They can touch at the edges but should not overlap, because any overlap stays pale and soft. Set the temperature to 400 degrees F. Run it for 3 minutes, then open the basket and check the color. If you want it darker, or you want the second side to match, flip each slice and run another 1 to 2 minutes. Pull the toast when it reaches the shade you like, remembering it firms up and looks slightly darker as it cools on the plate.
Butter and toppings go on after toasting, not before. Buttering raw bread and then air frying it sounds efficient, but the butter just soaks in and the bread browns unevenly, and any sugar in a spread can scorch. Toast first, butter second, while the toast is hot enough to melt the butter into it. The only exception is garlic bread or cheese toast, which I will cover further down, where the topping is the point.
Time and temperature by darkness
Toast is personal. Some people want barely-there golden bread, others want a dark, crunchy slice that stands up to heavy toppings. The beauty of the air fryer is that you dial in exactly where you land just by adjusting minutes. Here is my chart for standard sandwich bread at 400 degrees F, flipping at the halfway point.
Two things to keep in mind reading this chart. First, every air fryer runs a little differently, so the first time you make toast in yours, check at the early end and learn your machine. After one batch you will know your exact numbers. Second, bread thickness changes everything. Thin, airy sandwich bread browns fast and can go from pale to burnt in 30 seconds, so watch it closely. Thick, dense bread takes longer to color all the way through, which brings us to bread types.
Adjusting for different breads
Not all bread toasts the same, and a single time will not serve a bagel and a slice of brioche equally. The denser and thicker the bread, the longer it needs; the airier and sweeter the bread, the faster it browns and the closer you watch it. Here is how I adjust.
Thin white sandwich bread is the fastest. It can reach golden in 2 to 3 minutes, so I check it at 2 and rarely flip. Whole wheat behaves similarly but browns a touch slower because it is denser. Thick-cut sourdough or artisan bread is the opposite: it can take 5 to 6 minutes and benefits from a flip, because the crumb is dense and needs more time for heat to penetrate. Bagels, sliced in half and placed cut-side up, toast in 3 to 4 minutes and crisp beautifully, though I give the cut face the up position so it gets the most direct air.
Sweet or enriched breads (brioche, challah, raisin bread) brown fastest of all because their sugar caramelizes quickly. Drop to 375 or 390 degrees F for these and watch closely, or the edges darken before the center is even warm. The general rule: the more sugar and the thinner the slice, the lower and faster you go; the denser and thicker, the longer you let it ride.
The bread-flying problem, and how to stop it
Here is the issue the basic recipes gloss over. A light slice of bread weighs almost nothing, and the air fryer fan moves a lot of air. Partway through cooking, a slice can lift off the basket and pin itself against the heating element above, where it instantly chars on that corner and can even smoke. It happened to me the first time I tried this, and I spent a minute baffled before I figured out the fan had flipped my toast onto the coil.
There are two clean fixes. The simplest is to lay an air fryer rack, a small trivet, or an oven-safe wire rack on top of the bread to hold it down. The weight keeps the slice flat and the air still circulates through the rack. The second fix is to anchor each slice with a toothpick or two pushed through into the bread, pinning it to nothing but keeping it from sailing; this works but the rack-on-top method is tidier and I prefer it.
If you are toasting denser bread like sourdough or a bagel, this is rarely an issue, because the bread is heavy enough to stay put. It is the light, airy sandwich slices that fly. So match your method to your bread: heavy bread needs nothing, light bread gets a rack on top. Either way, never walk away during the first batch, because toast goes from perfect to scorched in under a minute and there is no recovering a burnt slice.
Garlic bread, cheese toast, and other upgrades

Once you are comfortable with plain toast, the air fryer opens up a few upgrades a toaster cannot touch. Garlic bread is the obvious one: spread butter mixed with minced garlic and a little parsley on the bread, then air fry at 375 degrees F for 4 to 5 minutes. The lower temperature keeps the garlic from burning while the bread crisps. No flip, since the buttered side is the point and you want it facing up.
Cheese toast follows the same logic. Lay cheese on the bread, air fry at 375 degrees F for 4 to 6 minutes until the cheese is bubbling and the edges are golden. Because the topping faces up, you skip the flip entirely. Cinnamon toast works too: butter the bread, sprinkle cinnamon sugar, and air fry at 375 for 4 minutes, watching closely because the sugar can scorch. In all three cases, the rule is lower temperature and no flip, because you are protecting a topping rather than browning bare bread.
For a savory breakfast, toast pairs naturally with eggs and bacon from the same machine. Run your air fryer bacon first, hold it warm, then toast the bread in the rendered-clean basket. The kitchen experts at The Kitchn have long argued that toasting in a convection-style appliance gives more even color than a toaster, and the air fryer is essentially a compact convection oven, so the same logic applies in your basket.
You can also use air fryer toast as a base for quick open-faced meals. Toast a thick slice, then top it with melted cheese, a fried egg, or avocado for an easy lunch, all built on bread crisped in the same machine you used for the toppings. French toast and Texas toast work too, though those are wetter and benefit from a sheet of parchment underneath to catch drips and a slightly lower temperature so the egg coating sets without scorching. The point is that toast is rarely the whole meal, and because the air fryer is already out and hot, building the rest of the plate around it keeps everything fast and contained to one appliance. A green starter or a light soup from a network like Simmerstead rounds out a toast-based lunch nicely when you want something warm alongside.
Cleaning and keeping it from sticking
Plain toast leaves almost no mess, which is part of the appeal. The crumbs that fall through the basket are easy to shake out, and there is no butter or oil residue if you toasted dry. Give the basket a quick wipe and you are done. The mess only appears with buttered or cheesy toast, where drips can land in the bottom of the drawer.
For garlic bread or cheese toast, a small piece of parchment under the bread catches the drips and saves you scrubbing, though you should weigh it down or cut it to size so the fan does not blow it around. Our guide to using foil and liners safely in the air fryer covers when a liner helps and when it blocks airflow, which matters because a liner that covers the whole basket floor will keep your toast from crisping underneath.
One small habit prevents sticking: do not toast on a cold, bare basket if the bread is buttered or cheesy. A light spritz of oil or a fitted parchment round keeps the topping from welding to the metal. Plain dry bread rarely sticks at all, so for everyday toast you can skip this entirely and just brush off crumbs between batches.
Batch toasting and make-ahead tips
Where the air fryer really pulls ahead of a toaster is volume. If you are making toast for a family breakfast or a brunch crowd, you can fill the basket or both racks of an oven-style unit and turn out six slices in a single run, then immediately load another batch into the still-hot machine. The second batch toasts a touch faster because the chamber is already warm, so check it a minute early. Keep finished slices warm in a low oven or under a clean towel while you run the rest, and you can plate a dozen pieces of even, golden toast in the time a two-slot toaster would still be on its third round.
For meal prep, you can even toast bread slightly under your target color, let it cool fully, and store it in an airtight bag. A quick 1-minute pass back through the air fryer at 350 degrees F re-crisps it on demand without burning, which is handy if you like to prep breakfast components ahead. This works best with sturdier breads; thin sandwich bread can dry out if you store it pre-toasted, so save the make-ahead trick for sourdough, bagels, and other dense loaves that hold their texture. Either way, the air fryer turns toast from a one-or-two-slices-at-a-time chore into something you can genuinely batch.
FAQ
What temperature do you toast bread in an air fryer?
400 degrees F is the standard for plain toast, giving golden color in 3 to 4 minutes. For sweet or enriched breads like brioche, drop to 375 or 390 degrees F so the sugar does not scorch. For garlic or cheese toast, also use 375 degrees F to protect the topping.
How long does toast take in the air fryer?
Most sandwich bread toasts in 3 to 4 minutes at 400 degrees F for classic golden color. Light toast takes 2 to 3 minutes, dark and crunchy toast takes 5 to 6 minutes. Thick sourdough runs longer than thin white bread, so check at the early end the first time.
Do I need to preheat the air fryer for toast?
No. Toast is one of the foods where preheating gives no real benefit, so you can place the bread in a cold basket and start the timer. Skipping preheat saves a few minutes and the toast still browns evenly.
Do I need to flip the bread?
Flipping is optional but recommended for even color. Without a flip, the side facing the fan browns a little more than the side facing down. Flip once at the halfway mark if you want both faces to match, especially for darker toast.
Why did my toast fly up and burn?
Light bread can lift off the basket in the air fryer fan and char against the heating element. Stop it by laying an air fryer rack or small trivet on top of the slices to hold them flat. Denser breads like sourdough are heavy enough to stay put on their own.
Can I butter the bread before toasting?
For plain toast, butter after, not before, because butter on raw bread soaks in and browns unevenly. The exception is garlic bread or cheese toast, where the buttered or topped side faces up and the topping is the goal. In that case, toast at 375 degrees F without flipping.
Bottom line
Making toast in the air fryer is as easy as 400 degrees F for 3 to 5 minutes, with a flip at the halfway point for even color. It beats a toaster on capacity and evenness, handles thick sourdough and bagels a toaster slot cannot fit, and turns into garlic bread or cheese toast with a quick switch to 375 degrees F. The one thing to remember is that light bread can fly in the fan, so weigh it down with a rack on top and never leave the first batch unattended. Learn how your machine runs, butter after toasting, and you have crisp, golden toast on demand without ever touching the toaster again.