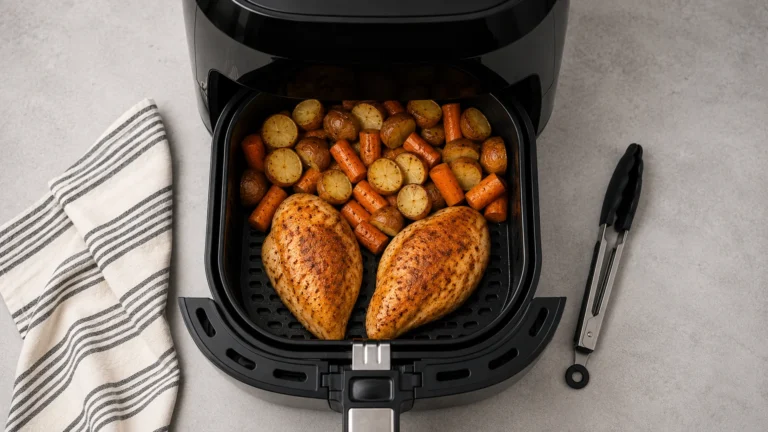
Homemade french fries in air fryer form are the single most requested thing I get asked about, and most people are one or two small habits away from nailing them. I have cooked fries in three different basket models and two oven-style units, burned a few batches, served a few sad limp ones, and eventually landed on a routine that gives you a crisp shell and a fluffy middle without a pot of bubbling oil on the stove. This is not a recipe card. This is the why behind every step, the temps and times that actually matter, and the fixes for the problems that show up when fries go wrong.
The short version is this. The air fryer is a small convection oven with a fan that moves hot air fast. It crisps the outside of a potato by driving off surface moisture and browning the starch. What it cannot do is replace the deep cleaning a fry gets when it sits fully submerged in oil. That gap is exactly what the soak, the dry, and the light oil coat are designed to close. Get those three right and the machine does the rest.
Why Air Fryer Fries Behave Differently Than Deep Fried
A deep fryer cooks a potato from every angle at once because oil wraps the whole surface. An air fryer cooks mostly from the hot air hitting the exposed faces, so the side touching the basket gets less airflow. That is why shaking matters so much here and barely matters in a fryer. The fan also pulls moisture off the surface aggressively, which is great for crisp but punishing if your fries are wet or crowded. Steam has nowhere to escape in a packed basket, so the fries closest to the middle end up steaming each other into a soft, pale mess.
There is also the browning chemistry to think about. The golden color and the toasty flavor come from the Maillard reaction, a set of reactions between sugars and amino acids that kicks in strongly above roughly 285 F. The air fryer hits that easily. The trick is getting the surface dry enough that it browns before the inside overcooks. If you want the deeper science on it, the Maillard reaction overview on Wikipedia walks through what is happening at the molecular level, and it explains why a dry, lightly oiled surface browns faster than a wet one.
Picking and Cutting the Right Potato
Russets are the default for a reason. They are high in starch and low in moisture, which means a fluffy interior and a surface that crisps cleanly. Yukon Golds work and give you a creamier center with a slightly more golden skin, but they brown faster so watch them. Waxy red or new potatoes hold together but stay dense in the middle and never get that classic fry texture. For a first batch, buy russets and do not overthink it.
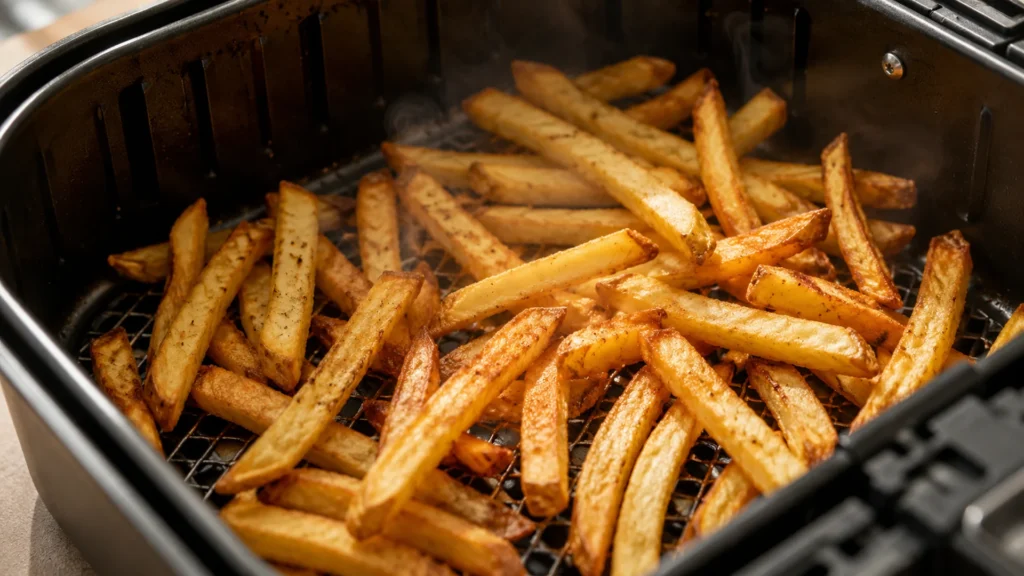
Cut size decides everything downstream. A thick steak fry needs more time and a lower finish, while a shoestring crisps in a flash and burns if you blink. My default is a square baton about 3/8 inch on a side, which is a touch thicker than a fast food fry. Uniform thickness is more important than the exact number. If half your fries are pencil thin and the other half are chunky, the thin ones char while the thick ones are still raw. Take the extra ninety seconds to cut them even.
The Soak and Dry Step Most People Skip

Here is the step that separates good fries from great ones. After cutting, drop the raw fries into a bowl of cold water and let them sit for at least 30 minutes, and up to a couple of hours if you have time. The water pulls surface starch off the potato. That loose starch is what makes fries gummy and what makes them stick together in a clump. A rinse and soak leaves you with a cleaner surface that crisps instead of gluing itself to its neighbors.
Drying is non negotiable. After the soak, dump the fries onto a clean towel and pat them until they look matte, not shiny. Any water still clinging to the surface turns to steam in the basket and steam is the enemy of crisp. I usually spread them out, blot the top, flip the pile, and blot again. Two minutes of drying buys you a noticeably better crust. If you skipped the soak entirely, at minimum rinse and dry well, because wet starchy fries are the number one reason a batch comes out soft.
Oil, Salt, and Seasoning Timing
You need oil, but far less than people assume. Roughly one to one and a half teaspoons per medium potato is plenty. Toss the dried fries in a bowl with the oil until every piece has a thin sheen, then arrange them. A high smoke point oil is the safe pick since the air around the fries can run hot near the heating element. Avocado, refined canola, and peanut oil all hold up. Extra virgin olive oil can work at 360 F but I keep it for the lower and slower cuts.
Salt timing is a real debate and I land on this. Salt before cooking if you want it to stick and you are fine with a slightly less crisp shell, or salt the second they come out hot when the surface oil grabs the salt instantly. I prefer salting right out of the basket. For anything beyond salt, like paprika, garlic powder, or pepper, add it after cooking too, because dry spices can scorch and turn bitter in the dry heat. The one exception is a cornstarch dusting. A light toss of cornstarch with the oil before cooking builds an extra crisp layer, and it is the closest you get to a double fried texture without the oil bath.
Loading the Basket and Why Crowding Ruins Everything

Air needs to move around each fry. A single layer with a little breathing room is the goal. Two stacked layers will cook, but the bottom ones steam and you trade crisp for convenience. If you are feeding a family, cook in batches and hold the finished fries on a wire rack in a 200 F oven so they stay crisp while the next batch runs. Piling hot fries on a plate traps steam underneath and softens them within minutes.
Shaking is the active part of the job. Pull the basket and toss the fries every 5 to 7 minutes. This rotates the pieces that were face down into the airflow and breaks up any that started sticking. Three shakes across an 18 minute cook is about right. If your model is an oven style with trays instead of a basket, rotate the trays top to bottom at the halfway mark and shake by hand. For a refresher on basket habits in general, my guide on how to cook in an air fryer covers spacing and shaking and the small moves that change results.
Temperature and Timing for Different Starting Points
Raw homemade fries are the focus here, but you will not always start from a fresh potato. Frozen bagged fries are already blanched and oiled, so they cook hotter and faster with no soak. Leftover fries need a quick reheat rather than a full cook. The table below is my working chart. Preheat the unit for 3 minutes before raw fries go in so the surface sears on contact instead of slowly warming. If you are not sure whether your model benefits from preheating, my note on how to preheat an air fryer explains when it actually helps.
For the two stage method that mimics double frying, run the fries at 320 F for 10 minutes to cook the inside through without much color, then crank to 400 F for 6 to 8 minutes to blister the outside. It takes longer overall but the contrast between crust and fluff is the best you will get from a home unit. If you have leftovers from any of this, the dedicated walkthrough on how to reheat fries in the air fryer brings them back to crisp far better than a microwave ever will.
Troubleshooting, Seasoning, and Cleaning Mistakes
Soft and pale fries almost always trace back to a wet surface or a crowded basket. Dry harder, cook in smaller loads, and bump the temp by 10 degrees for the last few minutes. Fries that brown on the outside but stay raw inside were cut too thick for the temp, so drop to 360 F and add time, or cut thinner. A batch that sticks to the basket usually skipped the soak, so that loose starch glued everything down. Burnt tips on shoestrings mean the cut was too thin for the heat, so move to a thicker cut or drop to 360 F.
One more practical issue is health perception, since fries get a bad reputation. The air fryer version uses a fraction of the oil of deep frying, and the bigger nutritional concern with any browned starchy food is acrylamide, a compound that forms when starches cook at high heat. The plain rule is to aim for golden rather than dark brown, since lighter color means less of it. The acrylamide reference on Wikipedia covers why that matters and why a soak helps, since rinsing off surface sugars reduces how much forms. Cook to gold, not mahogany, and you sidestep most of it while still getting a crisp fry.
If fries become a regular thing in your kitchen, it is worth branching into other starchy basket jobs, since the same spacing and drying habits carry over. The frozen hash browns in the air fryer guide uses the exact same crowding and crisp logic on a different cut. Plant based cooks running an air fryer can pull more ideas from the vegan air fryer recipes collection at Veganstove, and anyone who keeps fries gluten free will find naturally safe sides in the gluten-free snacks and sides hub at Recipesbend. Both pair well with a basket of homemade fries.
Beyond the failure points, a few habits round out the method. Plain salted fries are the foundation, but the air fryer makes it easy to branch out once the base is solid. The salt timing rule carries over directly. Wet flavorings and fresh herbs go on after cooking, while a few heat tolerant dry seasonings can ride along from the start. Garlic powder, onion powder, and smoked paprika hold up reasonably well, though I still prefer adding them in the last two minutes so they bloom without scorching. Anything with sugar in it, like a barbecue rub, burns fast in dry heat, so save those for the finish. For a restaurant style result, toss the hot fries the second they leave the basket with fine salt, a pinch of garlic powder, and a little grated parmesan, since the residual surface oil grabs the cheese and melts it just enough to cling. Fresh chopped parsley or rosemary added at this stage stays bright instead of turning to ash.
If you want loaded fries, build them on a sheet pan, scatter shredded cheese over the hot fries, and run the tray back into the air fryer at 350 F for 2 minutes to melt the cheese before adding cold toppings like scallions or sour cream. Cooking the fries first and melting second keeps the crust from going soft under the weight of the toppings. Sweet potato fries deserve their own note since they behave differently from russets. They carry more sugar and less starch, so they brown and burn faster and rarely get as rigidly crisp. Cut them a touch thicker, cook at 375 F, accept a slightly softer bite, and watch the final minutes closely, because sweet potato goes from golden to burnt in under a minute near the end.
Cleaning matters more than people think, because fries shed oil and stray bits of potato that will eventually smoke and taint the next batch. After the basket cools, wash it with warm soapy water and a soft sponge, and make sure the perforations or mesh are clear so air flows freely. A clogged basket cooks unevenly and leaves you wondering why one side came out soft. Most baskets are dishwasher safe, but hand washing extends the nonstick coating’s life. Pay attention to the heating element above the basket too, since splattered oil bakes onto it and burns off as smoke and odor during the next high heat cook. Wipe it gently with a damp cloth once it is fully cool, never while the unit is hot or plugged in. If you keep getting a faint burnt smell even with clean fries, the element is usually the culprit, and a quick empty run at 400 F for a few minutes after a greasy batch clears most of it. Pair that with regular basket washing and your unit will turn out clean tasting fries for years, since most problems people blame on the machine trace back to a basket that needed a wash or an element that needed a wipe. A clean unit cooks evenly, and even airflow is the whole reason these fries crisp in the first place.
Frequently Asked Questions
Do I really need to soak the potatoes first?
You do not have to, but you will get better fries if you do. Soaking pulls surface starch off the cut potato, which reduces sticking, improves crisp, and lowers acrylamide formation. If you are short on time, even a 10 minute soak and a thorough dry beats skipping it. The drying afterward matters as much as the soak itself, since wet fries steam instead of crisp.
Why are my air fryer fries soggy?
Soggy fries come down to moisture and crowding almost every time. Either the fries went in damp, or the basket was packed so tight that steam could not escape and the pieces cooked each other soft. Dry the fries until they look matte, cook in a single layer with space between pieces, and shake the basket every five to six minutes so every side meets the hot air.
How much oil should I use for homemade fries?
About one to one and a half teaspoons per medium potato is plenty. You want a thin even sheen on every piece, not a puddle in the bowl. Use a high smoke point oil like avocado or refined canola so it holds up to the dry heat near the heating element. Frozen bagged fries already carry oil from the factory, so they need none added.
Can I make homemade french fries in air fryer without any oil at all?
You can, and they will still cook through, but they come out drier and less crisp with a more baked texture. The thin oil coat is what carries heat to the surface and helps it brown evenly. If you want to skip oil for dietary reasons, dust the dried fries lightly with cornstarch instead, which builds a crisp shell and partly makes up for the missing fat.